
Windows 10 has an in-built utility for users to configure backups – either you would like a one time backup every once in a while, or scheduled backups, say once daily, weekly or monthly.
Backups are a life saver but most people don’t realize this until it’s too late – like when they turn on their computers just to find out that there’s an error on the screen similar to ‘no bootable device found’. In most cases, the information can still be retrieved but there are also situations where there’s no way to recover the data on the disk and the best thing to do is just replace the hard drive with a new one, and start afresh. So it’s always better to be safe than sorry.

How to back up your data
Depending on how much data you need backed up, I recommend you get an external hard drive or a USB flash drive.
To Configure a scheduled backup in windows – follow the below steps once you have an external storage handy
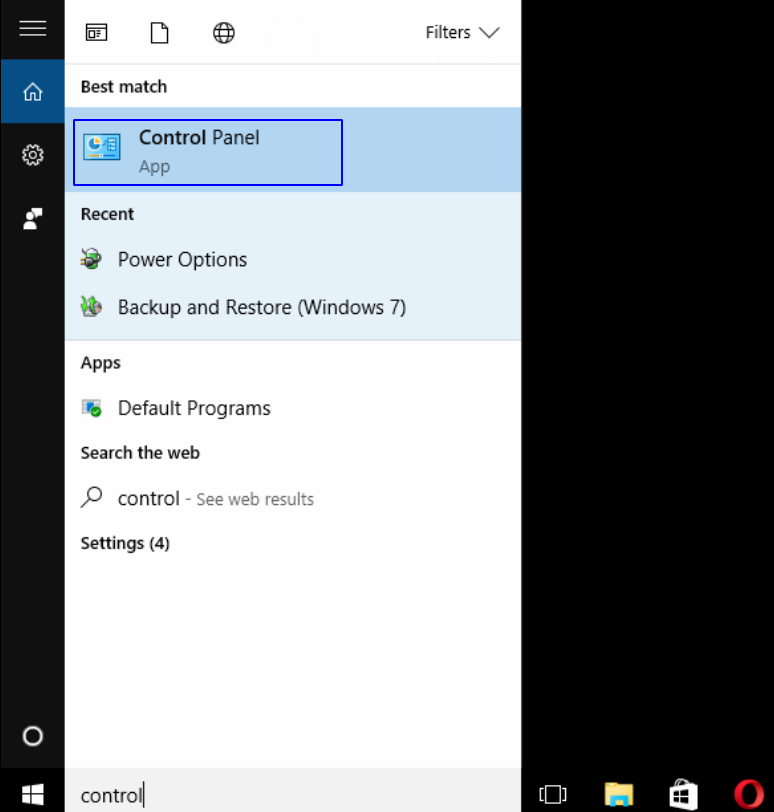
- On the search bar – located on the bottom left of your desktop, type in ‘Control Panel’. When the icon appears as shown below, press ‘Enter’ on keyboard.
- Once the Control Panel pops up, locate the search bar (on the top right corner) and type in ‘backup’ – as shown below
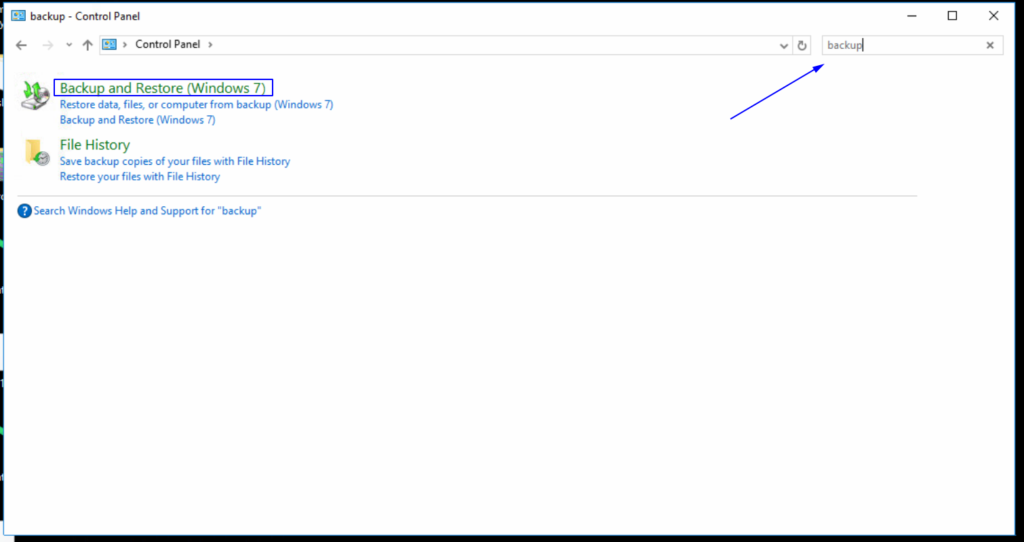
- Select to ‘Backup and Restore (Windows 7)’ as shown above
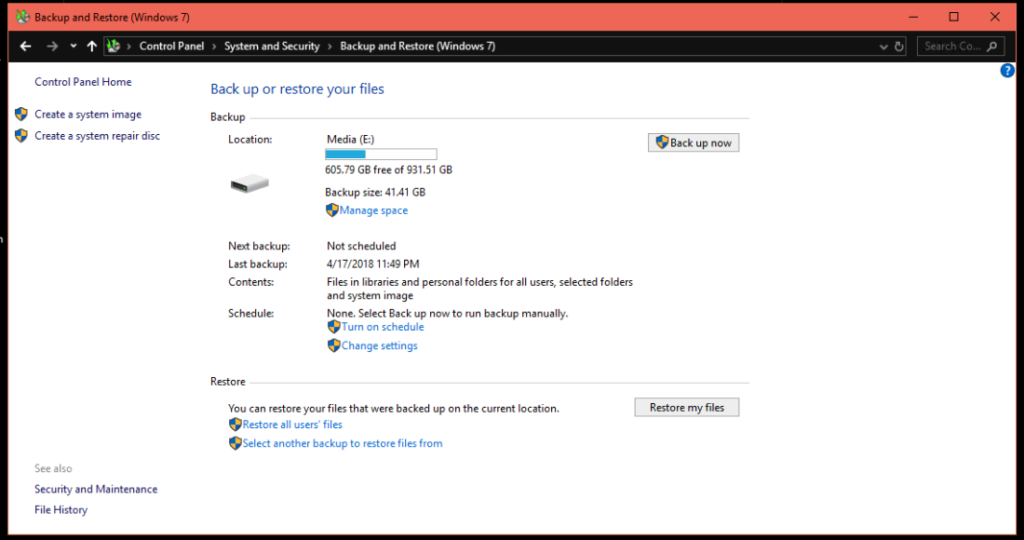
- Select ‘Change Settings’ beside ‘Schedule’ above
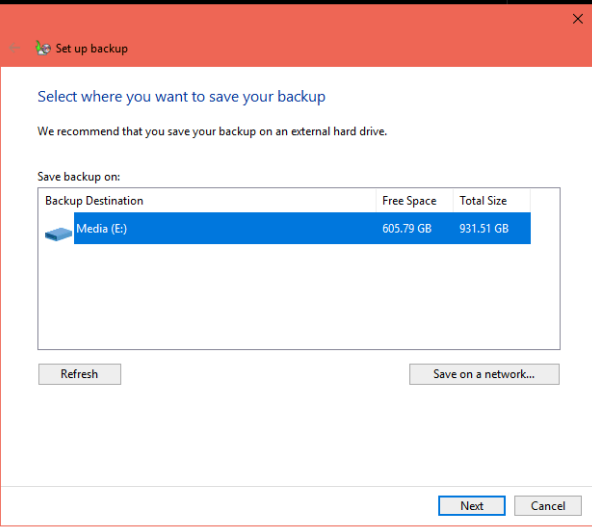
The screen above shows all external storage locations for a backup – in my case I just have one which is a 2nd drive installed inside of my desktop. If you have a lot of external storage devices such as USB Drives, External Hard Drives connected at once, you will see a list of all of them so pick your desired location carefully or just have only the drive you wish to use for a backup connected to avoid confusion. Once you’ve selected your dive of choice, click ‘Next’ to proceed…
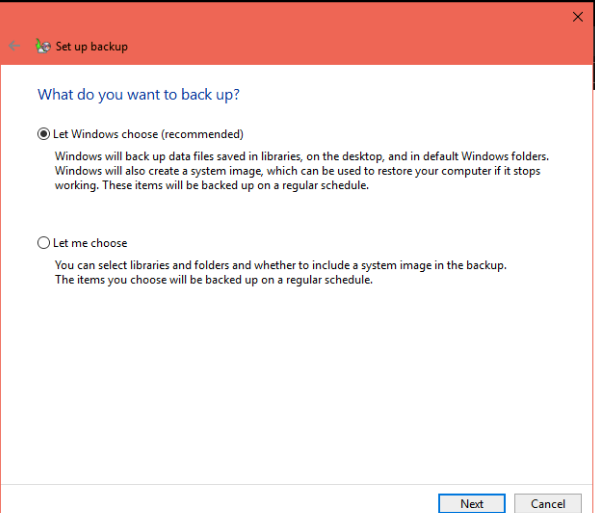
If you’re not sure where all your important files/folders are located, you might as well select or leave the default selection as shown above for a more comprehensive backup – recommended by Windows.
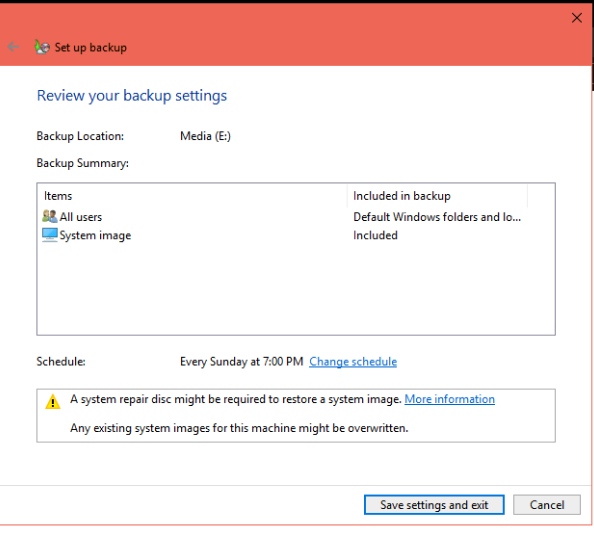
Go to the ‘Change Schedule’ link to customize the backup routine
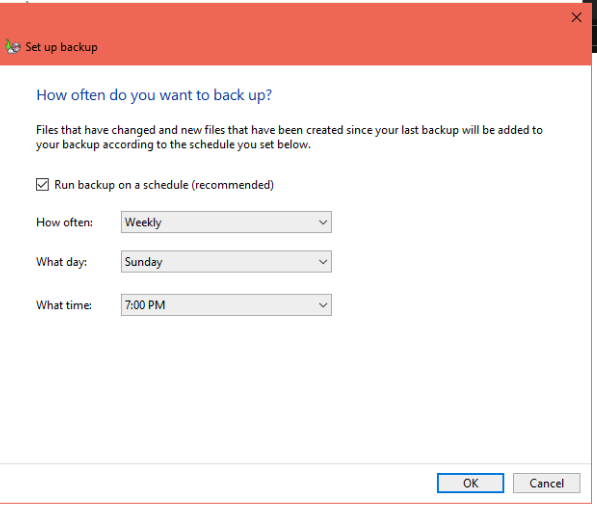
Then make your selections from the list above accordingly, Select OK then Select > ‘Save settings and exit’.
Please comment if you had any issues following the steps above or if you have any other suggestions.