
TeamViewer is definitely one of the most popular remote desktop applications. It’s a program that enables you to connect to any Computer or electronic device such as smartphones, tablets & laptops etc. Provided that the device you’re connecting to already has a TeamViewer app installed and you know both it’s TeamViewer ID & Password.
Regardless of where the connecting device is located, if you’ve got the required credentials listed above, you can connect to it as long as it’s powered on and has an internet connection.
The most common uses for TeamViewer are;
The Remote Desktop feature – which helps to connect remotely to another Computer. This is probably the most common use of this app.
Using the app to connect remotely to another PC for troubleshooting purposes such as helping a friend or family member halfway across the world to install a printer, uninstall software or show them the location of a missing file or folder are just a few of the many reasons that its remote desktop feature is very popular in use.
Chatting – with customers, friends or clients and Scheduling remote conferences/meetings.
Remote File Transfer – Remotely transferring files from one device to another, that’s in another location is another good reason people use this app.
But why configure TeamViewer with a Personal Password and Unattended Access???
The first reason you may want to consider doing this is because by default, the password generated by TeamViewer always changes after a set period or interval.
That is done for security purposes because a lot can go wrong were your ID and Password falls in the wrong hands or maybe you gave the default credentials to a Technician to troubleshoot your PC as a one time service.
If that password stayed the same, it means they will always have a way to access your Computer, without your permission if they wanted to. The best measure to stay secure is create a personal password that only you know, you can modify and give to trusted individuals. Even when you don’t trust them, you can always go back and change it. Just do it before they do!
Also, the default passwords are usually displayed in clear text, to the left of the TeamViewer Dashboard where it says ‘Allow Remote Control’. If you were in a public place and there were big time, overall trench coat wearing, up to no good mafia hackers around, that would be another cause for alarm. So situations like this would be a good reason to setup a personal password.
After setting up a Personal Password, Unattended Access is necessary also. To be specific, the feature that says ‘Start TeamViewer with Windows’. That’s because for instance, you have a PC at home and you’re traveling with a laptop and would like to connect remotely to your home PC, you have a Personal Password set for your home PC and you’re able to connect to it from your remote location but suddenly, you have to do something that requires a reboot on the home PC.
TeamViewer does not activate automatically upon starting up or rebooting a Computer unless the Unattended Access feature – ‘Start TeamViewer with Windows’ is manually selected. So in order to keep a continuous connection between reboots, or even if you haven’t accessed your remote PC in a week or more, the two settings to enable for TeamViewer are;
- Set a Personal Password
- Under ‘Unattended Access’ >> ‘Start TeamViewer with Wibdows’
How to set a Personal Password
Note: There’s always more than one way to achieve the same results when it comes to dealing with computers – the steps listed in this tutorial are intended to be as precise and easy to remember as possible.
If you already have TeamViewer running, launch the Dashboard by double clicking on the icon, if you don’t have it running, do the same to launch the program.
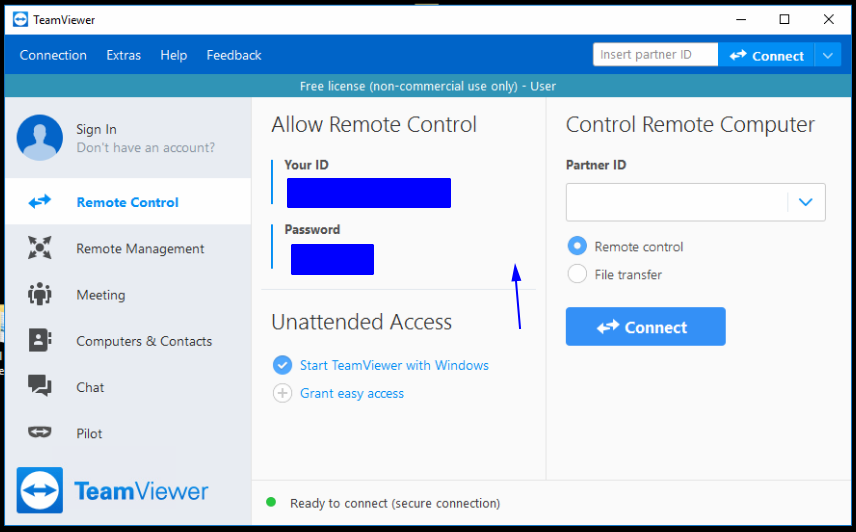
Hover your mouse exactly where you see the arrow pointing above. This is sort of a hidden feature, kind of a shortcut to get to the ‘options’ settings in TeamViewer Version 14. You’ll see a circular arrow appear. Click on the circle and in the list of options that appear, select ‘set personal password’.
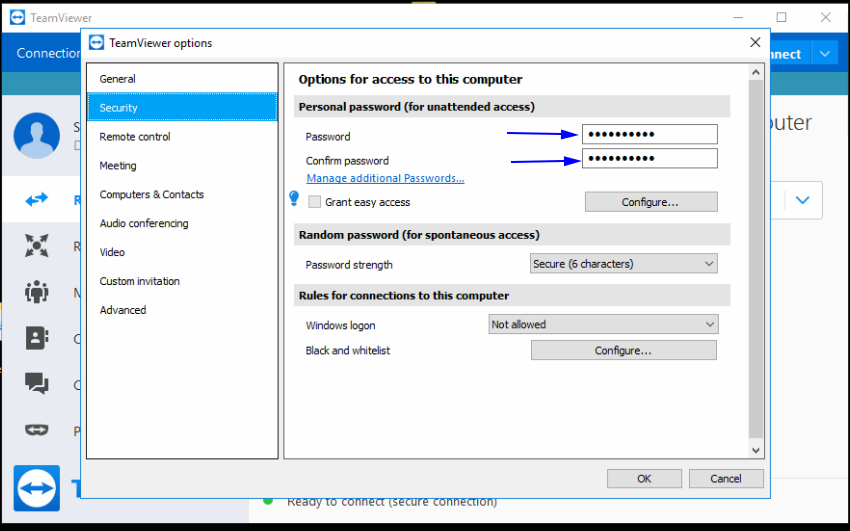
Type in your password of choice, confirm it in the second arrow in the above screenshot, click ‘OK’ and that’s it.
The next step is to enable the program to start with windows under Unattended Access. Very easy.
Unattended Access: Start TeamViewer with Windows
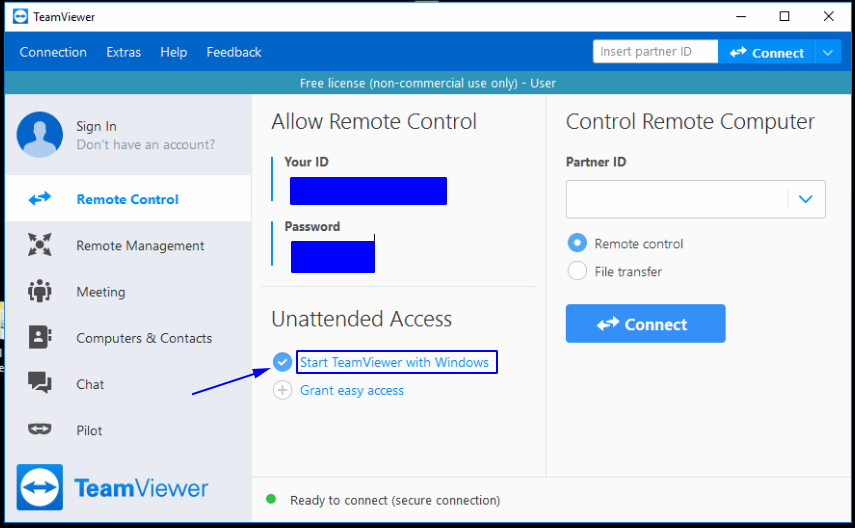
Select the option from the dashboard as listed above and you’re good to go.
After setting up both features, it’s always a good idea to test the connection with another device like a tablet, or another laptop just to make sure it works.

I enjoy studying and I believe this website got some truly useful stuff on it! .
I gotta bookmark this web site it seems very helpful handy