
What is Plex anyway?
Just like you have all the other media player programs like Windows Media Player, Netflix, Hulu, etc. Although they all have their differences here and there, they have one major thing in common, to stream media content. Be it Videos, Music, Pictures, etc. Plex serves the same purpose, but it functions in a different way because it enables you to set up a central server program locally on a computer, where all your media can be stored, then all other devices, which are referred to as clients can access the server to stream whatever media is available on that server, remotely.
Server Vs Clients
A Server in technology terms, can be defined as a machine that stores information – think of this like a server at a bar or restaurant with a list of all their food and drink items on a menu. The client on the other hand, would be the customer who comes into the restaurant in need of something to eat or drink. So they get the menu from the server and place an order based on what they would like to have from the list of items.
This analogy applies all across the board in the technology world. Whenever you hear the term server, just know that there are many types of servers, like file servers, web servers, database servers, and the list goes on. But their main function is to serve their clients some sort of information. Clients are simply any device or computer that is used to pull data from the server, for the purpose of gaining information, or modifying it (granted the right permission to do so).
Another thing to consider is that a Server machine can also act as a client, and vice versa. Think of both server and client as separate programs on a computer because they are. This means that you can decide to run a server and client program on the same PC. People do this all the time for various reasons. One being that there’s only one computer available, another could be for testing purposes. So in order for the server to be accessed, a client program has to exist.
In most cases, a server is more like a program that runs in the background, waiting for requests from clients. So whenever you’re accessing content on your computer, like movies from Netflix, that beautiful looking interface that allows you to browse through the list/categories of movies and shows available is built mainly for the client to have a nice user experience, and ease of use.
Servers are more concerned with the configuration of the program such as, how many clients will I give access to at the same time, who will I allow read and write access, how long do I make myself available to my clients, how many clients do I give access to simultaneously, who do I ban from accessing my stuff altogether, I don’t like how that last guy kept trying to guess his password, maybe it was a hacker, I should ban him…. Etc (because servers also keep logs of clients who access them). They aren’t made to look pretty. They’re main function is to be as functional and robust as possible.
Why Plex?
As mentioned earlier, there are tons of other media players available, but Plex has a lot of wonderful features that enable you to access and share your personal media with friends, and on all other devices either locally, or across the internet in a secure way. You cannot achieve this with programs like Windows Media Player or Netflix.
Windows Media simply enables you to play content you store locally on your PC. It doesn’t go beyond that so if that’s what you want to do, that’s fine. Netflix is a great web app that enables you to watch whatever they have available in their database, with an internet connection and a paid subscription.
With Netflix, you can also add multiple users, or share your account with family and friends so that they can stream content as well. I love Netflix too, they’ve got a huge selection of media that you can stream but you have no control over what is available. They control what gets added and what gets removed. The only control you have, is who you share your account with, and what your password should be.
I admit Plex may not be for everybody, but if you store a lot of media locally on your computer like music, pictures and movie files, and would like to access them anywhere at home or with family and friends, Plex is definitely for you! Another great thing about Plex is that it is Free! With their most recent feature updates, you can even listen and watch free content directly from the Plex interface such as Podcasts, Movie trailers, News, Some Documentaries and Music, all from one central location.
In case you aren’t satisfied with the above features, you can subscribe for a Plex Pass at $5/month – 3 months minimum (yes you have to get past the free zone), which adds even more. One of which enables you to watch and record local TV streams but in order to do this, your device would need a TV tuner card, which is a device that enables you to connect a local TV antenna to a computer so that you can watch, record, pause and rewind local TV stations as if your computer was a Television (on steroids). Plex Pass offers a lot of other features which you can check out on the plex.tv website.
If you’re sold on giving Plex a shot, below are the steps to set up your very own Plex Media Server and add media.
Go to https://www.plex.tv/ where you can either get Plex for free by signing up (Get Plex Free option), or download Plex software locally onto your computer (Get Plex on your Device). We’ll go with the latter since we want a local server on our machine. Let the screenshots guide you through this process below… Note that you’ll still need to set up an account along the way.

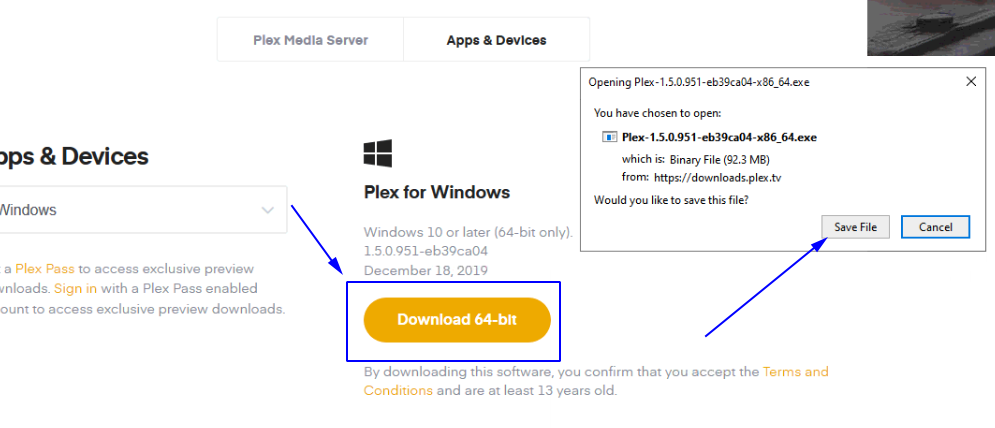
Get Plex on your device, download and save file as shown below..
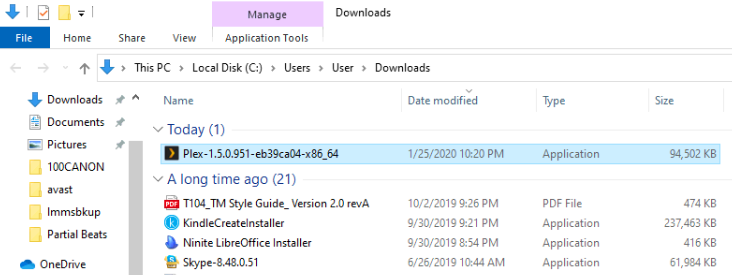
Once download is complete, open the program file to have Plex run, so we can have the server configured.
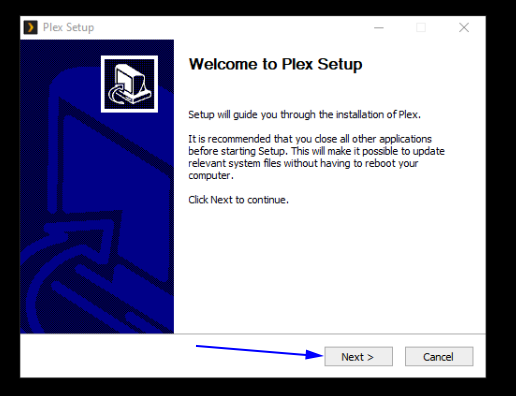
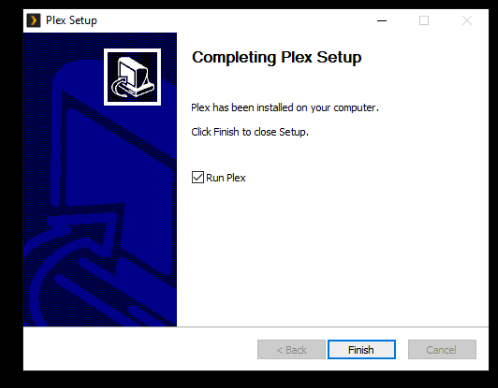
You can just click through the rest of the prompts which are default setups to have Plex files installed, then Finish and leave the ‘Run Plex’ check mark on.
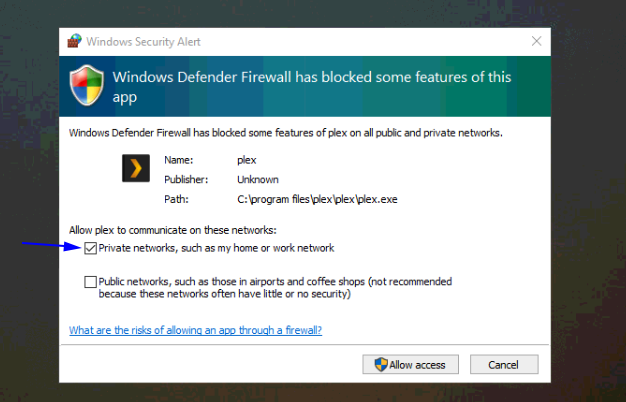
Also allow access to Plex on your firewall, since it runs on a special web port on the browser of the local machine. Do not select the second option below for the sake of tighter security.

I was hoping that I could get around having to sign up. But things have changed I guess! For older versions, you could get away with this, if you were just downloading the program locally on your machine like in this tutorial.
Go ahead and sign up, if you don’t already have an account. I have one so that means you’ll see a populated list of media.
Adding Your Media
In order to add a folder or file on your hard drive, follow steps below. In this example, I will be adding a list of Scary movies since I have a folder of Scary movies located on my hard drive, I just have to point Plex to the right path.
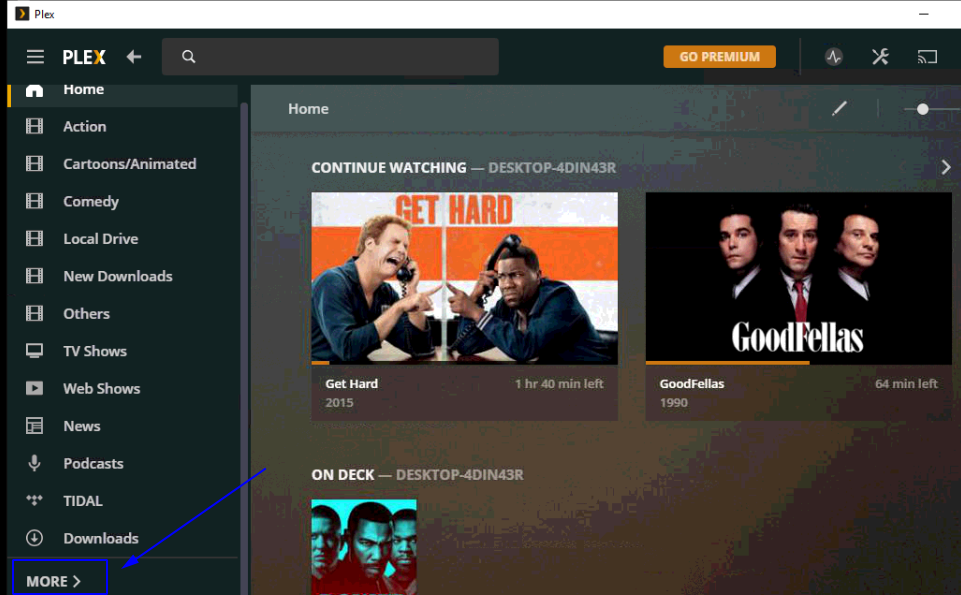
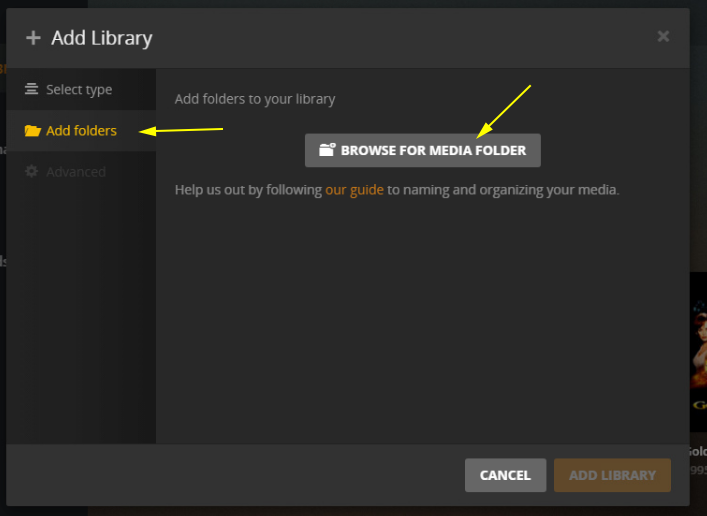
Click on the ‘More’ option to access those settings that will enable you add new folders.
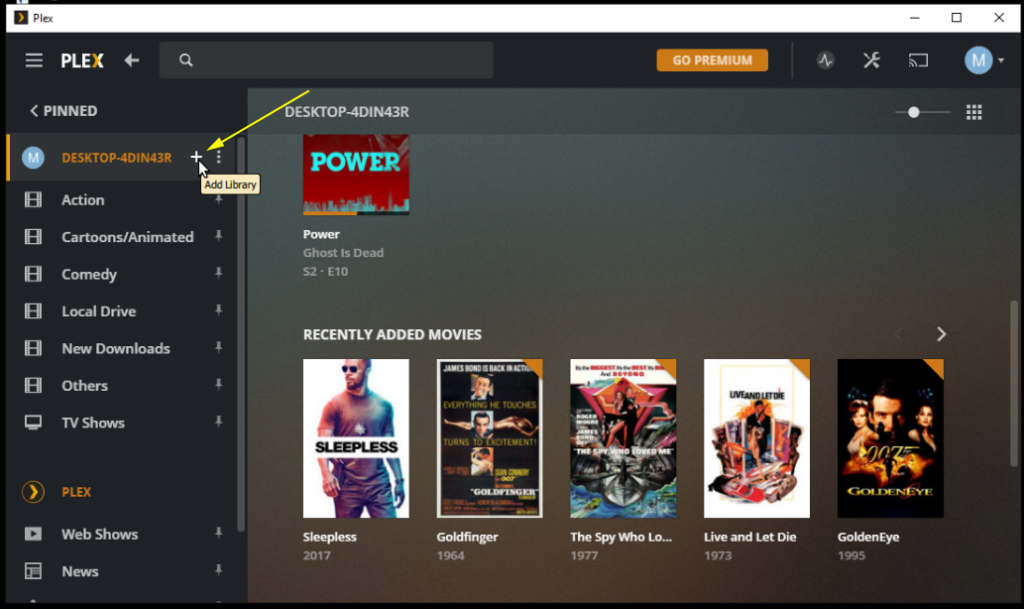
Select the plus sign to add files or folders…
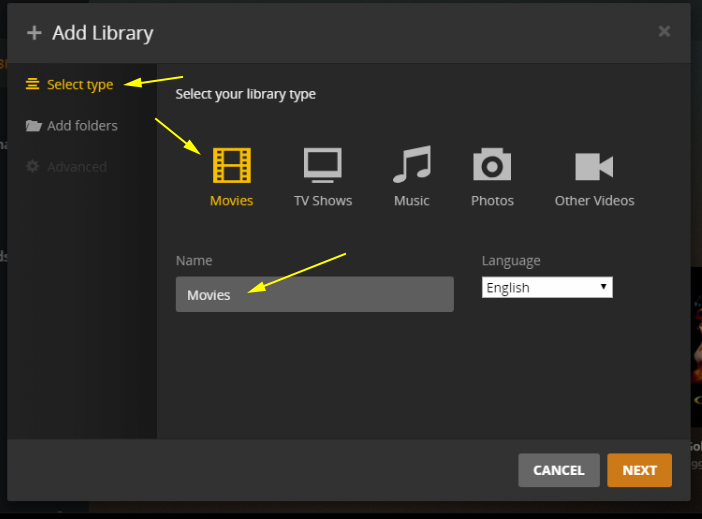
Now for the next step, if you have a bunch of unorganized movie files lying around on your hard drive and do not care what order they’re arranged you can select Movies and point Plex to their location. You can also give them a customized name from below, but this only pertains to Plex. The file’s original name would not change if you’re trying to locate it outside the Plex software.
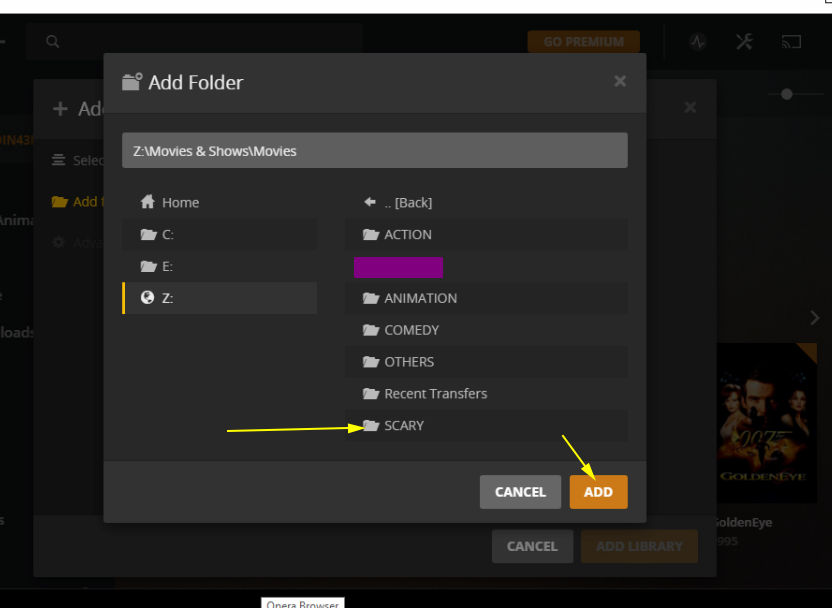
In this scenario, I already have my files organized according to movie genres, so I’ll just change the name above to ‘Scary’ on Plex, then I would just be adding folders which makes my job easier and less confusing. I know where my files are, and I know what they’re called. If you would like to learn how to keep your cluttered files organized, check out how to organize files/folders in Windows.
Make sure to select Media type before going to ‘Add folders’ tab. If you’re adding Music, select Music instead, Etc.
Proceed by selecting Add folders…
What I’m doing here is adding an entire folder of Scary Movies, under my Movies directory. If I went into my Scary movie folder and selected just one movie, it would only add that movie. So keep in mind that there’s a difference. Adding one movie or song at a time is tedious and time-consuming. This adds all scary movies at once. It may take some time to load them though.
It’s better to group and organize your saved files or whatever you have swimming on your desktop. Unless you have just a few, but better to start early. A wise man once said – ain’t nobody got time for that!!! Notice the path of the selected folder below, right after where it says ‘add folder’.
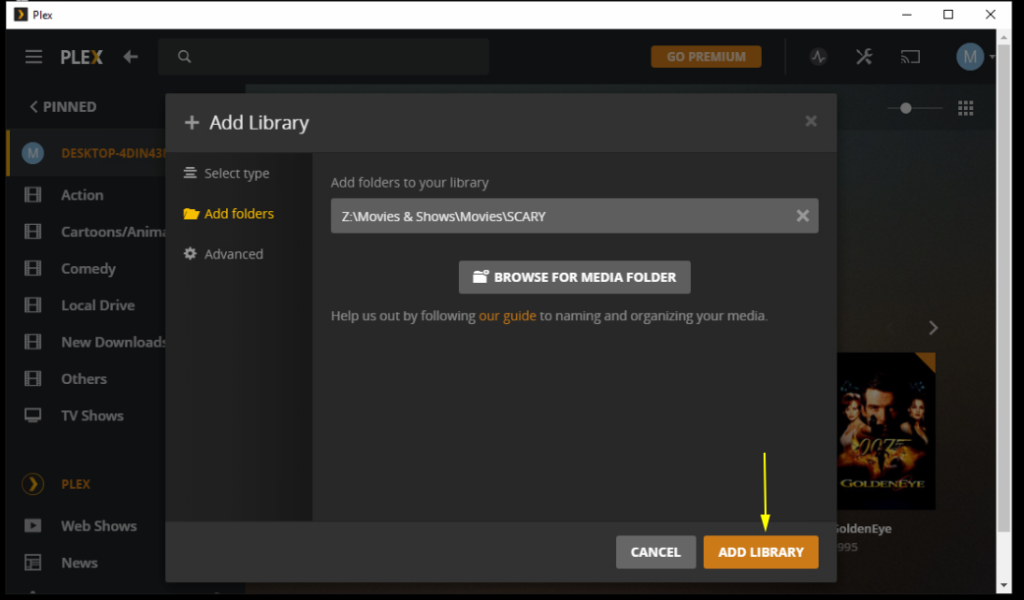
As you can see below, the Scary movies have populated and you can see the navigation pane on the left adds ‘Scary’ to the categories.
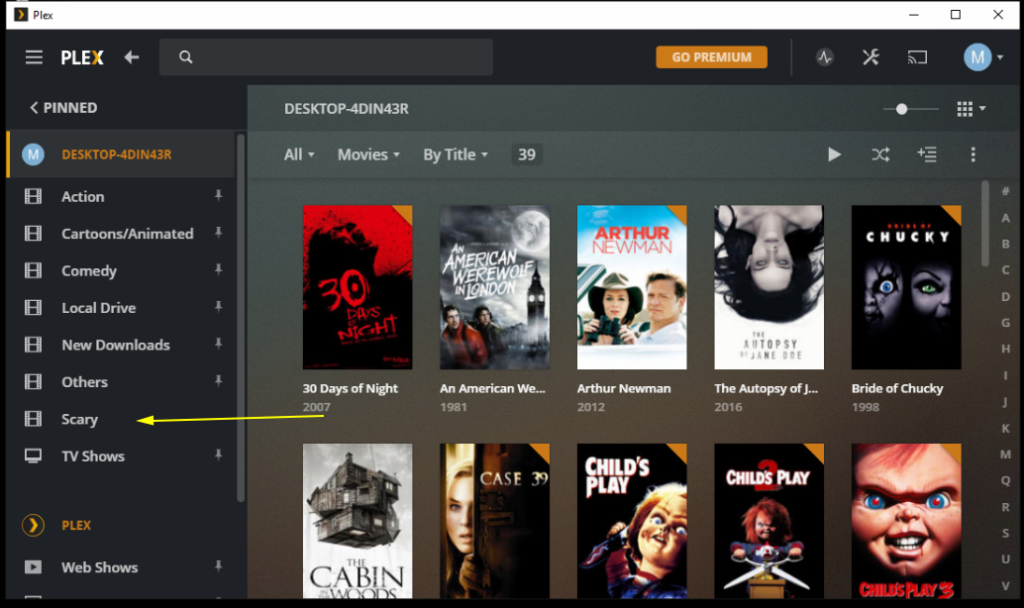
That’s about it! You can repeat the previous steps to keep adding more content onto Plex.
Connecting with other devices require that they have the Plex app downloaded and you can sign in with your account and Plex will have your files available to stream on that device.
But keep in mind that your server (the one where all the movies are stored) must be powered on, Plex must be running (it usually runs on startup, in the background), and connected to the internet, before you can find them on other remote devices. If it’s not available (offline/powered off), you’ll see an exclamation mark beside your files/folders.
It’s also a good idea to check that Plex runs on start up on your machine. You can check out how to enable/disable programs on startup. If you don’t know how where to look.

I am sure this post has touched all the internet visitors, its really really fastidious article on building up new website.
I read this paragraph fully on the topic of the difference
of hottest and earlier technologies, it’s remarkable article.
Hey there I am so grateful I found your blog, I really found you by mistake, while
I was searching on Bing for something else, Anyways I am here now and would just like to say many thanks for a fantastic
post and a all round exciting blog (I also love the theme/design), I don’t have time to read through it all
at the moment but I have book-marked it and also added in your RSS feeds, so when I have time I will be back to read more, Please
do keep up the excellent job.
I love it when people get together and share opinions.
Great blog, stick with it!
You have made some good points there. I looked on the internet for more
info about the issue and found most individuals will go along with your
views on this web site.
I am really impressed with your writing skills and
also with the layout on your blog. Is this a paid theme or did you modify it yourself?
Anyway keep up the nice quality writing, it’s rare to see a great
blog like this one today.
Hello, it’s a free theme that got tweaked over time I would say.. And thank you for your comment!
I just love reading the things you write. Thank you for sharing with us. God bless Hollie Bertrand Drummond
Thank you very much for your comment! Thanks for reading
Regards for this post, I am a big big fan of this site would like to go on updated. Elga Brodie Becka
Best view i have ever seen !
Thank you, thank you!!!
hi, your site is so good.Following your articles.
Thank you!!
Like!! I blog quite often and I genuinely thank you for your information. The article has truly peaked my interest.
Thanks for sharing superb informations. Your website is very cool. I am impressed by the details that you?¦ve on this site. It reveals how nicely you understand this subject. Bookmarked this web page, will come back for extra articles. You, my friend, ROCK! I found just the info I already searched everywhere and simply could not come across. What a perfect web site.
Awesome post! Keep up the great work! 🙂